Stay Private. Stay Secure. Stay Free.
Trusted by millions worldwide – protect your online life with #1 VPN
- ⚡ Blazing-fast speed on every server
- 🔒 Military-grade encryption & protection
- 🌍 Access content globally without limits
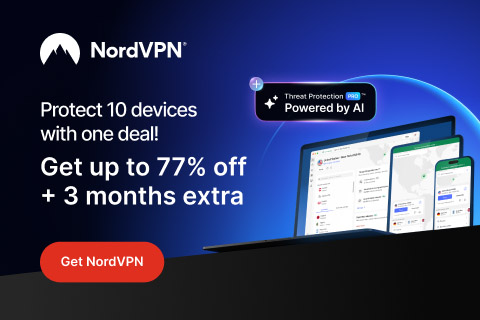
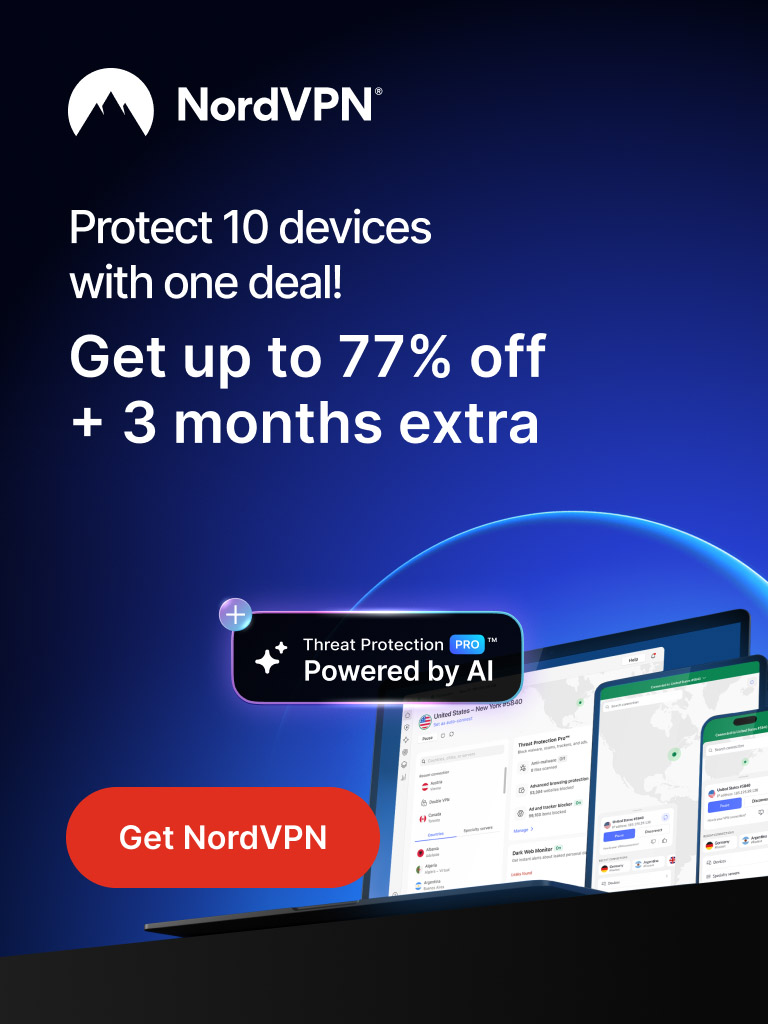
- 📱 Up to 10 devices with one account
In today’s fast-paced online world, a reliable VPN in your browser can be a quiet superhero—protecting your privacy, streamlining your online experience, and giving you greater control over how you connect to the vast corners of the internet. The NordVPN Chrome extension makes it easy to toggle a robust, secure tunnel without leaving your current browsing flow. Whether you’re trying to bypass geographic restrictions for streaming, safeguard your data on public Wi‑Fi, or simply keep your browsing habits private from curious onlookers, adding a VPN directly into Chrome can be a game changer. This article will walk you through the process in a calm, practical way, with plenty of real‑world tips and a focus on making the experience smooth from the moment you decide to take action to the moment you’re comfortably navigating with the extension enabled. By the end, you’ll know how to add nord vpn chrome extension, how to get set up quickly, and how to keep your connection secure while you work, study, or relax online.
Why a Chrome Extension Makes VPN Use Easier
Google Chrome is the browser many of us reach for first every morning, and it’s also the place where we do a lot of sensitive activities—logging into accounts, handling payments, and sharing personal information across websites. A browser‑level VPN extension, such as the NordVPN chrome extension, provides a number of practical benefits. First, it centralizes control: with a single click you can connect to a server in a country of your choosing, switch to a recommended fast server, or disconnect when you’re done. This avoids the fiddling dance of configuring a whole separate app or trying to coax a VPN into working through a particular site. Second, it minimizes leakage by design. When you enable the extension you’re effectively routing your browser’s traffic through a secure tunnel, which guards against IP address exposure that can occur in some mixed configurations. Third, the extension often includes handy features tailored for browsers, such as integrated ad and tracker blocking in some configurations, easy to use kill switch options, and clear indicators that show whether you are protected. Finally, using the chrome extension nordvpn setup process typically requires fewer steps and less system‑level permission than full‑device VPNs, making it an approachable entry point for beginners and a reliable accelerator for power users who want to stay focused on their work without wrestling with complicated software.
To get the most from your nordvpn chrome webstore experience, you’ll want to understand the difference between just enabling a VPN and actively choosing the right server for your needs. If you’re trying to watch a show that’s region‑restricted, you’ll likely want a server location that’s known to work with that service. If you’re protecting your data on a public network, you’ll want to enable auto‑connect on startup and perhaps turn on features like a kill switch that stops any traffic if the tunnel drops. The balance you strike depends on your goals, your location, and the kind of online activities you engage in most often. Throughout this guide, we’ll keep those aims in sight as we walk through each step of the process and show you how to tailor the chrome extension nordvpn setup to your personal workflow.
What You’ll Need Before You Begin
Before you dive into the actual installation, take a moment to assemble a few things that will smooth the journey. You don’t need a full NordVPN plan to explore the extension, but having an active subscription unlocks the full set of servers and features, which is especially helpful if you plan to use the chrome extension in earnest. In practical terms, you’ll want a modern Chrome browser, a reliable internet connection, and a few minutes of quiet time to complete the setup without interruptions. Here’s a short checklist to keep you organized:
- Active NordVPN account (email, password, and plan details) or a trial if you’re testing features.
- Chrome browser updated to the latest version to ensure compatibility with the extension.
- Access to nordvpn chrome webstore for easy installation and updates within Chrome.
- Basic awareness of where you want to connect from (for example, a country or region you’re curious about testing).
- Optional but recommended: preferred unlock settings such as auto‑connect rules, kill switch, and split tunneling preferences.
Having these in front of you will speed up the process and help you avoid common friction points, such as authentication prompts that pop up while you’re trying to navigate through the Chrome Web Store. You’ll find that many people who start with the extension discover that the overall experience is smoother than expected, especially because the chrome extension nordvpn setup is designed to be straightforward for first‑timers while still offering depth for power users.
Finding NordVPN on the Chrome Web Store
When you’re ready to begin, the browser experience centers on the chrome webstore, a familiar gateway for adding features to Chrome. The nordvpn chrome webstore entry is the starting point where you’ll discover the official extension, learn about latest updates, read user reviews, and confirm that you’re downloading from the legitimate NordVPN publisher. A quick search for “NordVPN Chrome extension” or a direct search for “NordVPN” will surface the official option, along with related extensions that you might explore later for complementary security tools. It’s important to ensure you’re selecting the genuine NordVPN product to avoid any third‑party clones that could compromise your security. Once you land on the right page, you’ll see clear prompts that guide you toward adding the extension to Chrome and addressing permission requests that the extension requires in order to function properly.
For many users, the moment you reach the nordvpn chrome webstore page is a relief—the visuals are clean, and the installation button is large and unmistakable. The chrome webstore page typically includes a concise description of features, a list of permissions that the extension will request, and a user rating that reflects real‑world experiences. If you’re not sure whether you’re looking at the official NordVPN extension, check the publisher label and the number of installations. A reputable extension will display NordVPN as the publisher and provide a credible installation count and reviews. If you’re curious about the difference between the extension and other NordVPN products, you’ll likely see notes explaining that the chrome extension adds VPN capabilities directly to your browser; it’s not a full‑device VPN replacement, but it integrates deeply with browser traffic to protect your online activity while you’re using Chrome.
Step-by-Step: Add nord vpn chrome extension
Here’s the heart of the process—the step-by-step path that takes you from curiosity to a fully functioning chrome extension nordvpn setup in your browser. The approach is deliberately simple, and each step is designed to minimize friction while maximizing clarity. By following these steps, you’ll be able to add nord vpn chrome extension quickly and with confidence, so you can begin to enjoy protected browsing with the least possible hassle. Remember to keep your NordVPN account information handy, because you’ll likely need to log in within the extension to unlock its full set of features and servers.
- Open Chrome and navigate to the chrome webstore. The address bar will normally show a URL starting with https:// chrome.google.com/webstore/. You’re here to locate the NordVPN extension, so you can search for NordVPN or specifically for “nordvpn chrome webstore” to confirm you’re on the legitimate page.
- Click the extension’s card to open its details. You’ll see a description, screenshots, and user reviews. If this is your first time, you may notice a small panel that explains the extension’s permissions. It’s a good idea to read these so you understand what browsing data the extension can access and how it uses that access to provide protection and features.
- Tap the Add to Chrome button. A confirmation dialog will typically appear, listing the permissions the extension will request. If you’re comfortable with those permissions, confirm the installation. The browser will download and install the extension, and you’ll see the NordVPN icon appear in the toolbar near the address bar.
- Click the NordVPN icon and sign in to your NordVPN account. If you don’t have an account yet, you can start a trial or create a new account directly from the extension’s setup flow. The sign‑in process is essential for enabling full server access and syncing your preferences across devices, so take a moment to enter your credentials accurately.
- Choose a server or utilize the recommended automatic connection. The extension typically presents a map or a list of server locations. You can select a preferred country, a recommended fast server, or use the auto‑connect feature that connects you to the best server based on your location and network conditions. This is where you’ll begin to see the practical benefits of the chrome extension nordvpn setup.
- Toggle the connection to verify it is active. The NordVPN icon will usually indicate a connected state, and you can open a new tab to test your IP address or try loading content that was previously region‑restricted. If you encounter issues, you can try switching servers or using the auto‑connect feature again to see if the experience improves.
As you follow these steps, you’ll notice how easy it is to execute the primary objective: install nordvpn chrome extension and begin protected browsing with minimal disruption to your workflow. The process is designed to be intuitive, and if you’ve used browser extensions before, this one will feel familiar and straightforward. If you’re curious about alternative wording or you hear people mention “addon” instead of “extension,” you’re not alone—this topic comes up frequently and is covered in the next section.
Alternative: Add nordvpn chrome addon
Some users refer to browser protections as add‑ons or extensions interchangeably, depending on their background or the platform they’re using. When you search for security tools, you might see the term add nordvpn chrome addon used by tutorials or forum posts. The important thing is that the functionality is the same: you’re integrating NordVPN’s protection into the Chrome browsing experience. The steps to actually add nordvpn chrome addon mirror the standard extension process: locating the official NordVPN listing on the chrome webstore, confirming you’re dealing with the legitimate publisher, clicking Add to Chrome, signing in, and choosing a server. The only difference you might notice is terminology in various help articles or user guides, but the core actions and results remain identical. If you come across a guide that uses addon language, you can confidently translate it into the extension steps described above and proceed with the same confidence, knowing you’ll reach the same endpoint: a secure, browser‑level VPN connection.
In practice, most users who adopt this approach appreciate the clarity of tasks and the speed at which they can get to a protected browsing state. The terminology difference should not deter you from proceeding with the straightforward steps to add nordvpn chrome addon or to transition to the more familiar term extension once you’ve started. Either path gets you to the same destination: a protected browsing experience that you can activate with a single click and manage directly from your browser’s interface.
Installing and Configuring: install nordvpn chrome extension
With the initial installation behind you, it’s time to focus on the fine details of installation and configuration that ensure the tool works exactly as you intend. The phrase install nordvpn chrome extension is a practical reminder that this stage is not just about getting the extension in place but also about ensuring it is configured to protect you in the most efficient way. A careful setup includes logging into your NordVPN account, selecting your preferred security settings, and adjusting your browser permissions so that you don’t encounter annoying prompts or blocked content. The typical flow is simple:
- Sign in to your NordVPN account from within the extension’s panel.
- Select a server location based on your current objective—streaming, browsing securely, or accessing content from a different region.
- Enable features like auto‑connect and kill switch if you value continuous protection and want to guard all traffic even if a VPN session drops.
- Optionally configure split tunneling if you want certain sites or apps to bypass the VPN for performance or accessibility reasons.
During the install nordvpn chrome extension process, you’ll often encounter a couple of practical decisions. For example, you may be asked whether you want to allow Chrome to use the VPN extension to create network requests. In most cases, you should approve this to ensure the extension can route traffic, providing the protection you expect. If you’re in a controlled work environment, you might need to check with your IT department about policy constraints. In general, the chrome extension nordvpn setup is designed to be clear and unobtrusive, so you’ll be guided through the necessary steps with clear prompts and helpful tips. This is where many users discover that the extension is not just a security tool; it’s a usability enhancer that helps you keep your browsing experience smooth and private in a world full of trackers, ads, and curious data collectors.
Configuration Details: chrome extension nordvpn setup
Beyond the basic activation, the chrome extension nordvpn setup includes a small set of controls that give you control without turning your screen into a technical manual. Here’s a closer look at key options you’ll encounter and how to configure them for everyday use:
- Auto‑Connect: This feature ensures you’re protected as soon as Chrome starts or when you connect to a new network. If you value privacy on public Wi‑Fi or shared devices, auto‑connect is a strong ally.
- Kill Switch: The kill switch halts all traffic if the VPN connection drops unexpectedly, preventing your real IP from leaking. This is especially important for users who must maintain strict privacy standards during sensitive tasks.
- Preferred Servers: You can save favorite servers or regions for quick access, which saves time when you’re switching between tasks or streaming services.
- Split Tunneling (where available): This lets you control which apps or sites use the VPN tunnel and which bypass it. It’s perfect for balancing performance and protection for different online activities.
- Notifications and UI Elements: You can customize how the extension notifies you about connection status and server updates, helping you stay informed without being overwhelmed by messages.
As you implement and tweak these settings, you’ll likely find your preferred configuration becomes almost second nature. The chrome extension nordvpn setup is designed to be forgiving—start with the defaults that NordVPN recommends for most users, and then adjust based on your experiences. If you’re new to VPNs, the default configurations often provide a solid, privacy‑preserving baseline that you can refine as you go along. If you’re a power user who wants granular control, you’ll appreciate the range of options that allow you to tailor performance and privacy exactly to your needs.
Security, Privacy, and Best Practices
Security and privacy are not just features you turn on and forget about; they are ongoing practices. Adding the NordVPN Chrome Extension brings browser‑level protections, but to maximize safety, it’s smart to pair the extension with general good security habits. For example, use strong, unique passwords for your NordVPN account and enable two‑factor authentication if you haven’t already. Regularly update the extension to the latest version, which ensures you have the newest security patches and performance improvements. When you browse with the extension, you’re creating a shield around your browser traffic, but it’s worth remembering that other apps on your device may still leak data or reveal information about your online behavior. If you want comprehensive device‑level protection, consider pairing the Chrome extension with NordVPN’s full desktop client, which offers additional layers of security and features that extend beyond the browser itself.
Another practical tip is to be mindful of what sites you sign into while using a VPN. Some sites have anti‑VPN measures, and a cautious approach helps you avoid login errors or service interruptions. If you run into conflicts, such as a streaming service’s detection of a VPN, you can try switching to a different server, clearing your browser cache, or temporarily turning off any conflicting browser extensions that could interfere with the VPN’s traffic routing. The objective is to maintain a balance between strong privacy protections and a smooth user experience, so you can focus on your content or work without annoying interruptions.
Troubleshooting Common Issues
Even with a clear, well‑documented path to add nord vpn chrome extension, you may encounter a few hiccups along the way. Here are some common issues and practical resolutions that have helped many readers and users in the wild. If you run into a problem, you’ll be better prepared to diagnose and correct it quickly, so you can return to a smooth browsing experience.
- Extension not appearing in the toolbar after installation: Refresh the page, close and reopen Chrome, or go to chrome://extensions and ensure the NordVPN extension is enabled. You may also try restarting the browser or the device if necessary.
- Login problems within the extension: Double‑check your NordVPN account credentials. If you use two‑factor authentication, ensure you complete that step after entering your password. If problems persist, reset the extension’s connection or re‑authenticate your account.
- Servers failing to connect or streaming blocks: Try a different server location, preferably one that NordVPN identifies as suitable for the service you’re trying to access. You can also use the auto‑connect feature to let the extension pick the best option automatically for you.
- Performance slowdown: Some servers may be overloaded in peak times. Switching to a different server in a nearby country or enabling split tunneling for less critical traffic can help maintain speed.
- Permissions prompts are intrusive: Review the requested permissions and confirm that you want the extension to manage your Chrome traffic. If you’re uncomfortable with any request, you can adjust permission settings or temporarily disable the extension to regain full browser control.
Remember that most issues resolve quickly by updating to the latest version, trying a different server, or re‑authenticating your NordVPN account within the extension. If problems persist, consult NordVPN’s support resources or community forums, where many users share practical fixes for a wide range of setups. The key is to keep your extension up to date and to approach issues methodically, testing small changes one at a time to identify what makes the most difference for your specific network and device configuration.
Table: Key Features and How They Help You

| Feature | Benefit | Notes |
|---|---|---|
| Auto Connect | Automatically secure your traffic when you start Chrome or join a new network. | Great for public Wi‑Fi or shared devices. |
| Server Selection | Choose from a wide range of locations for privacy or accessibility. | Experiment with nearby servers to optimize latency and speed. |
| Kill Switch | Stops all traffic if the VPN disconnects unexpectedly, preventing IP leaks. | Highly recommended for privacy‑conscious users. |
| Split Tunneling | Route only selected apps or sites through the VPN if desired. | Useful for balancing performance with protection. |
| Browser‑Only Protection | VPN coverage focused on Chrome traffic for quick, lightweight protection. | Not a substitute for device‑level VPN in all cases. |
Frequently Asked Questions

Q: Do I need to install nordvpn chrome extension if I already have the NordVPN desktop app? A: The chrome extension works in tandem with the desktop app to provide browser‑level protection. If you want to cover all traffic on your device, you may opt to install the full desktop client as well; however, for quick browser protection, the extension is typically sufficient. Q: Is the nordvpn chrome webstore page free of risk? A: As with any extension, ensure you’re downloading from the official NordVPN publisher and verify the publisher details. The chrome webstore page for NordVPN should clearly indicate the official publisher and a legitimate installation count. Q: Can I use the extension on multiple devices? A: NordVPN supports multi‑device use, and your account can authorize connections on different platforms. The Chrome extension, like other NordVPN products, integrates with your existing account so you can manage connections from any supported device. Q: How do I remove the extension if I change my mind? A: In Chrome, go to the extensions menu, locate NordVPN, and choose Remove. Your browser history and saved credentials will remain separate from the extension removal process.
As you explore these questions, you’ll find that the process of adding and configuring the extension is designed to be straightforward, and any potential confusion is usually short‑lived. If you ever worry about privacy implications or data handling, you can review NordVPN’s privacy policy and security white papers, which provide deeper insights into encryption standards, server practices, and how your data is managed when you use the chrome extension nordvpn setup. This transparency is part of what makes NordVPN a trusted choice for many users who want a practical, reliable tool to protect their browsing sessions.
Practical Tips for Everyday Use
Beyond installation and setup, there are everyday habits you can adopt to make the most of your NordVPN Chrome Extension. For example, if you’re a student who frequently hops between campus networks, enabling auto connect and keeping a small set of known good servers in your favorites will keep you protected without extra steps. If you’re a gamer or heavy streamer, you may want to experiment with a nearby location that offers lower latency. In some cases, you may find that certain streaming services are aggressive about blocking traffic from VPNs, so you might need to switch servers or temporarily disable some browser extensions that interfere with VPN routing. By approaching daily use with curiosity and a few simple preferences, you’ll discover that the extension is not a burden but a flexible partner in your online life.
In addition, consider your multi‑device ecosystem. If you use NordVPN on your phone or tablet, you can synchronize settings across devices, ensuring consistency in how you connect and protect your data. The chrome extension will remain a part of that ecosystem, protecting your browser traffic wherever you go, while other NordVPN apps keep your other network traffic secure. This multi‑layer approach can give you outstanding protection without sacrificing convenience, since you can leverage the chrome extension nordvpn setup to complement the broader protection strategy you’ve built across devices.
Putting It All Together: A Quick Recap of the Process
To ensure you leave with a clear mental map of how to proceed, here’s a succinct recap of the essential steps. This is a practical, mental checklist you can refer to as you embark on your journey to add nord vpn chrome extension and enjoy protected browsing:
- Open the Chrome webstore and locate the official nordvpn chrome webstore entry.
- Click Add to Chrome to begin the installation, then confirm the permissions prompt.
- Sign in to your NordVPN account from within the extension’s panel.
- Choose a server, or enable auto‑connect to ensure you’re protected from the moment you start browsing.
- Explore optional features like kill switch and split tunneling to tailor protection to your needs.
- Test your IP and streaming access to verify the extension is working as intended.
As you implement these steps, you’ll notice that the journey to add nord vpn chrome extension is less about a dramatic install and more about thoughtful, incremental improvements that enhance your everyday browsing experience. The result is not just a more secure browser but a more confident, flexible way to navigate the internet—whether you’re researching, streaming, or staying connected on the go.
Conclusion
Conclusion